Got the track laid last night while watching the History Channel, my favorite background noise next to a good football game.
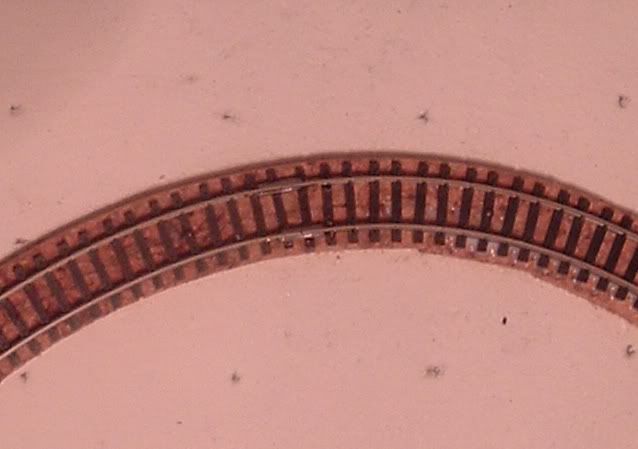
Running flex track is not too hard. Once you bend around the curve and secure it with track nails, just stop short about an 1 1/2" from the end. Cut your rails even and remove the plastic "spikes" on the last tie (some folks remove the tie, trim the spikes, then slip it underneath the finished track), then slip rail joiners on the ends. Place you next length of track onto the end, then solder the joints. The secret to soldering is a good, hot iron,---I use a very old Radio Shack 30 watt pencil iron myself (Yep, 'nother freebie castoff)---and clean surfaces. Then bend the track around your curve 'til the next joint.
When doing tight radius curves, I've found that you want to make sure that the sliding rail side of the track goes to the outside of the curve. This places the gapped side of the plastic tie strip in your favor, keeping them from bunching up at the joint. These curves are 5" radius, laid out from the bottom of a drywall mud bucket.

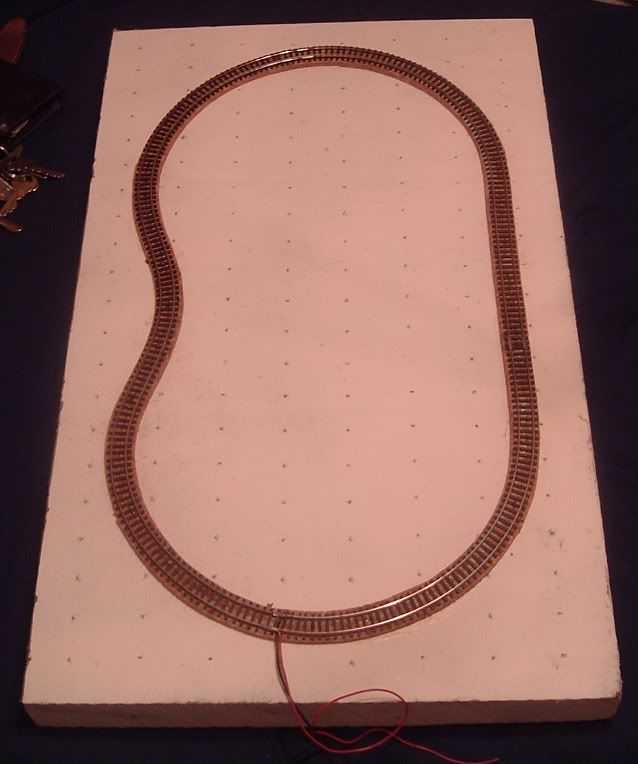
UPDATE: Alas, my curves are just a shade too tight for my locomotive. It worked well in testing but apparently, when under power, the torque skews the truck a bit, causing it to derail. I hope to find a trolley or small diesel model between now and December.


No comments:
Post a Comment